How to Connect Solar Panels to Home Storage Systems?

Time:2026-10-01 Author:Liam
0%

Learning how to connect solar panels to home storage systems begins with more than matching cables. It requires understanding energy flow, equipment limits, and household demand. Solar modules produce direct current, while most home appliances use alternating current. An inverter manages this conversion. A battery system stores surplus power for evening use, cloudy periods, or unexpected outages. The connection may involve a hybrid inverter, battery management system, main service panel, and backup transfer equipment.

NREL analyst Paul Denholm has emphasized that “energy storage can provide a variety of services to the grid.” That principle also applies inside a home. A properly designed system can reduce grid imports, support critical circuits, and improve the value of solar generation. However, battery voltage, inverter capacity, grounding, and shutdown controls must work together. A small mismatch can cause poor performance or unsafe operating conditions. Professional inspection remains important.

The practical process is rarely as tidy as a diagram. Roof panels may face different directions. The battery may sit far from the electrical panel. Cable routes can pass through tight spaces, and older wiring may need upgrades. These details matter. A useful guide should explain system architecture, equipment selection, wiring stages, commissioning, and maintenance. It should also acknowledge uncertainty. Every home has different loads, climate conditions, and installation constraints. Learning how to connect solar panels to home storage systems means building a safe, tested system—not simply plugging a battery into a solar array.
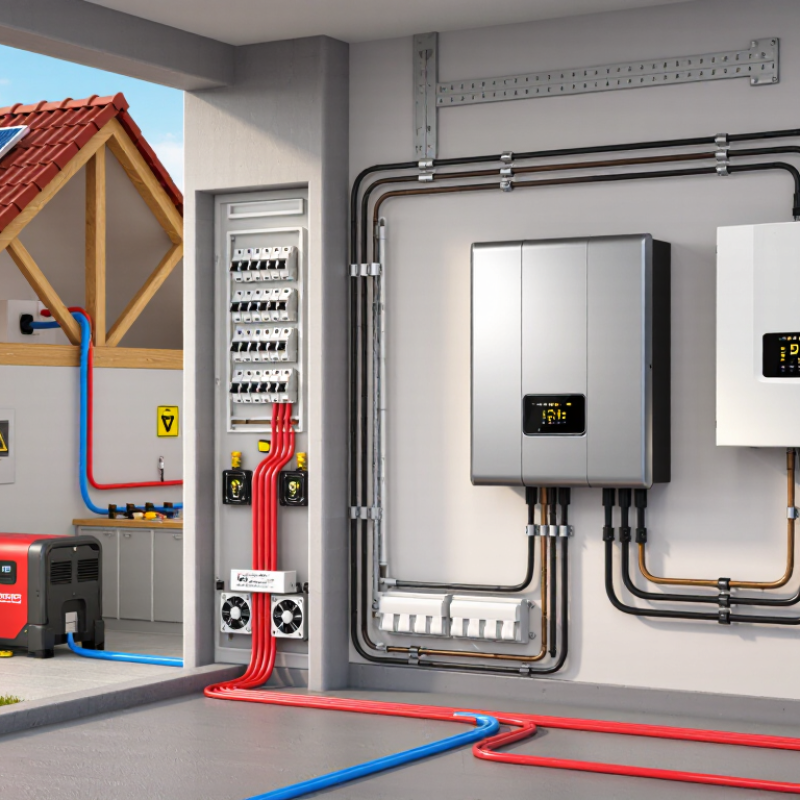
How to Connect Solar Panels to Home Storage Systems?

Assessing Solar Panels and Home Storage System Compatibility

Connecting solar panels to a home storage system starts with compatibility, not cable selection. Check panel voltage, current, and maximum power against the inverter’s input range. The battery must also match the inverter’s voltage and communication requirements. Small mismatches can cause shutdowns, heat, or shortened equipment life. Do not guess here. Review each technical sheet and installation limit carefully. A qualified electrician should verify the design under local electrical rules.

Panel configuration matters. Series strings raise voltage, while parallel strings increase current. Both must remain within the inverter’s MPPT limits, even during cold, bright weather. Battery capacity needs a realistic household load profile. A 10 kWh battery may not support heating, cooking, and overnight charging for long. Field assessments often fail when standby loads are ignored. Measure actual consumption, including pumps, routers, and refrigerators. It is an unglamorous detail.

Compatibility also includes mounting space, ventilation, backup circuits, and shutdown controls. Lithium-based batteries need approved protection and sufficient clearance. Older inverters may not communicate with newer storage units, despite similar voltage labels. Ask for a written wiring diagram, commissioning test, and maintenance schedule. Recheck assumptions after installation. Seasonal output, battery aging, and future loads can change the original calculation. A system that works on paper may still need adjustment in the utility room.

How to Connect Solar Panels to Home Storage Systems?

Assessing Solar Panels and Home Storage System Compatibility

The chart compares common residential solar array sizes with usable battery capacity. Battery values are based on 48 V, 100 Ah battery modules with a 90% maximum depth of discharge: 4.3 kWh per module, rounded to one decimal place.

Before connecting the system, confirm that the hybrid inverter supports the solar array voltage and current, the battery voltage range, charge and discharge power, and the required communication interface. Solar array power and battery capacity are related design factors but are not required to be numerically identical.

Choosing the Right Wiring Layout and Essential System Components

Choosing a wiring layout starts with the battery’s location and the inverter’s role. A DC-coupled system sends solar energy through a shared hybrid inverter before charging the battery. This layout can reduce conversion losses and simplify backup control. An AC-coupled system uses separate solar and battery inverters. It suits existing solar installations but adds another conversion stage. NREL’s 2024 Annual Technology Baseline uses approximately 85% round-trip efficiency for many lithium-ion storage models. Small losses still matter.

The essential components include a properly sized inverter, charge controller, battery management system, DC and AC disconnects, overcurrent protection, grounding, and monitoring equipment. Keep high-current battery cables short. Route them away from sharp edges and heat sources. Installations should also include a transfer device when backup circuits connect to the home panel. Local electrical requirements must guide every connection. A diagram is not enough.

The IEA’s Renewables 2024 report recorded nearly 420 gigawatts of new solar capacity worldwide in 2023. More homes now need storage designs that handle variable production safely. In practice, installers often discover that cable voltage drop was underestimated. That mistake can reduce charging performance. Measure actual cable distances, peak loads, and future expansion plans before selecting wire sizes. Leave service access around the battery. Keep it simple. Oversizing the battery may look efficient, but poor daily cycling can weaken the financial case. A professional inspection remains worthwhile, especially when the system supplies essential household circuits.

How to Connect Solar Panels to Home Storage Systems? - Choosing the Right Wiring Layout and Essential System Components

Category Wiring Layout or Component Primary Function Typical Electrical Data Recommended Connection Path Important Selection Considerations
System Layout DC-Coupled Solar and Storage Connects solar panels and the battery on the DC side before power conversion. PV array voltage and battery voltage are managed through charge-control equipment; common battery banks use approximately 48 V nominal architecture. Solar panels → DC combiner or isolator → MPPT charge controller → battery → hybrid inverter → household loads and grid. Often efficient for new installations, but the controller and inverter must support the selected battery chemistry, voltage range, current, and communication method.
System Layout AC-Coupled Solar and Storage Allows a battery system to be added to an existing solar installation using AC power. Solar inverter and battery inverter operate on the building's AC distribution system; residential systems commonly use single-phase or split-phase AC, depending on the region. Solar panels → PV inverter → AC distribution board; battery ↔ battery inverter → AC distribution board → loads and grid. Useful for retrofits, but repeated DC-to-AC-to-DC conversion can produce more conversion losses than a suitably designed DC-coupled system.
System Layout Hybrid Inverter Layout Combines PV conversion, battery charging, backup control, and grid interaction in one coordinated unit. Must be rated for PV input voltage and current, battery voltage range, continuous output power, surge power, and applicable AC supply voltage. PV array → hybrid inverter; battery → protected DC terminals; hybrid inverter → main panel, backup loads panel, and grid connection. Verify whether backup output is whole-home or limited to selected circuits and whether the inverter supports anti-islanding protection and required grid functions.
Solar Array Series String Wiring Increases array voltage while the string current remains approximately equal to the current of one module. String voltage is the sum of module voltages; the cold-weather open-circuit voltage must remain below the maximum PV input voltage of the inverter or controller. Panel positive terminal → next panel negative terminal until the string is complete → DC isolator or combiner → inverter or MPPT controller. Use modules with compatible electrical characteristics and account for temperature-related voltage changes during design.
Solar Array Parallel String Wiring Increases available current while keeping the voltage close to the voltage of one string. Array current is approximately the sum of parallel string currents; the combiner, conductors, and overcurrent devices must be sized for the combined current. Multiple PV strings → string fuses or circuit breakers where required → DC combiner → DC disconnect → inverter or charge controller. Avoid combining strings with significantly different orientations, shading patterns, or electrical ratings on the same MPPT input.
Solar Control MPPT Charge Controller Optimizes the PV operating point and converts variable PV voltage to the battery charging voltage. Selected by maximum PV open-circuit voltage, maximum PV short-circuit or operating current, battery voltage, and maximum charging current. PV disconnect → controller PV input; controller battery output → battery fuse or breaker → battery busbars. The controller must be compatible with the battery's charging profile and must not exceed its voltage or current limits.
Energy Storage Battery Bank Stores surplus solar energy for nighttime use, peak-load support, or backup operation. Residential storage is commonly specified in usable kWh and continuous kW; nominal battery architectures often include 12 V, 24 V, or 48 V, with higher-voltage systems also available. Charge controller or hybrid inverter → DC fuse or breaker → battery disconnect → battery terminals or busbars. Check usable capacity, maximum charge and discharge current, depth-of-discharge limits, temperature range, enclosure requirements, and battery management system compatibility.
Power Conversion Battery Inverter Converts battery DC power into household AC power and may convert AC power back to DC for battery charging. Rated by continuous AC output, surge capability, battery voltage range, efficiency, and grid-forming or grid-following capability. Battery bank → DC protection → inverter DC input; inverter AC output → dedicated breaker or backup loads panel. Calculate starting currents for motors, pumps, compressors, and other inductive loads when determining surge requirements.
Protection DC Fuses and Circuit Breakers Protect conductors and equipment from overcurrent and provide a means of isolation. DC-rated devices must match the system voltage, interrupt rating, and calculated circuit current. Install close to the battery positive terminal and at PV string or combiner outputs where required by the electrical design and local code. AC-rated breakers must not be substituted for DC-rated protection unless specifically approved for the application.
Isolation PV and Battery Disconnects Allow technicians and emergency personnel to isolate energy sources during maintenance or shutdown. Must be rated for the maximum system voltage, current, and number of poles required to disconnect energized conductors. Place PV disconnects near the inverter or required service location and battery disconnects between the battery bank and power electronics. Location, labeling, accessibility, and disconnecting means are governed by local electrical and fire-safety requirements.
Conductors PV and Battery Cables Carry DC or AC power between panels, protection devices, batteries, inverters, and distribution equipment. Conductor size depends on ampacity, installation method, ambient temperature, bundling, insulation rating, and allowable voltage drop. Use sunlight-resistant PV cable for exposed PV wiring and appropriately rated flexible or fixed wiring for battery and inverter connections. Keep high-current battery cables short, route positive and negative conductors together where practical, and tighten terminals to the specified torque.
Grounding Equipment Grounding and Bonding Provides a low-impedance fault-current path and bonds exposed conductive parts. Sizing and connection methods depend on conductor size, overcurrent protection, system configuration, and local code. Bond module frames, mounting rails, inverter enclosures, battery cabinets, and distribution equipment to the grounding system as required. Do not assume that equipment grounding is the same as bonding a battery negative terminal; follow the inverter and code requirements.
Surge Protection Surge Protective Devices Helps limit transient overvoltage caused by lightning activity or switching events. Select separate DC and AC surge protection with voltage ratings suitable for the connected circuits. Install at appropriate PV DC, inverter AC, and service or distribution points according to the risk assessment and local requirements. Surge protection does not replace proper grounding, bonding, overcurrent protection, or a lightning-protection design where required.
Monitoring Energy Meter and System Monitor Tracks solar production, household consumption, battery state of charge, import, and export. Measurements may include voltage, current, power, energy, state of charge, and operating alarms. Install current transformers or meters at the grid connection and connect monitoring interfaces to the inverter or energy-management controller. Meter placement must correctly distinguish generation, consumption, import, and export to avoid incorrect control decisions.
Backup Operation Backup Loads Panel and Transfer Equipment Separates priority circuits from nonessential loads during a grid outage. Panel and transfer equipment must be rated for the inverter's continuous output, fault current, and connected circuit loads. Main service → approved transfer or backup equipment → backup loads panel → essential household circuits. Avoid connecting a backup output to the utility supply without approved transfer or isolation equipment; this prevents dangerous backfeeding.
Design Note: Actual conductor sizes, fuse ratings, disconnect locations, grounding methods, battery capacity, and inverter settings must be calculated for the specific installation and verified against the applicable electrical, building, fire-safety, and utility-interconnection requirements.

Installing Safety Equipment and Preparing the Connection Points

Before connecting solar panels to a home storage system, prepare the work area and isolate every power source. A qualified electrician should verify the system design, local requirements, and equipment ratings. Never rely on sunlight alone; panels can produce voltage whenever light reaches them. Use insulated gloves, eye protection, nonconductive tools, and a properly rated multimeter. Keep the battery area dry, ventilated, and free from combustible materials.

Install the required safety equipment before making connection points. This may include DC disconnects, overcurrent protection, grounding conductors, and surge protection. Each device must match the system voltage and current. Clearly label panel, battery, inverter, and emergency shutoff circuits. A visible label can prevent a dangerous guess during maintenance. Check that cable insulation is undamaged and that connectors are clean, dry, and fully compatible.

Connection preparation needs patience. Inspect the mounting structure, cable routes, and entry points for sharp edges or water exposure. Leave enough cable slack for service, but avoid loose loops that can collect heat or moisture. Tighten terminals to the manufacturer’s specified torque, then record the readings and test results. Do not skip the final polarity check. It takes minutes. A rushed inspection can still miss a reversed conductor or a loose terminal. That possibility deserves respect, especially when the installation appears simple.

Connecting the Solar Array, Battery, Inverter, and Home Electrical Panel

How to Connect Solar Panels to Home Storage Systems?

A safe home system follows a clear energy path: solar array, inverter, battery, and electrical panel. The array sends DC electricity to the inverter’s MPPT inputs. The inverter then converts DC into AC for household circuits and grid export. A compatible battery connects to the inverter’s dedicated battery terminals, not directly to the panel. Hybrid inverters can manage charging, backup power, and grid interaction through one control system.

At the main electrical panel, the inverter connects through a correctly sized breaker and approved transfer equipment. During an outage, this equipment isolates selected backup circuits from the grid. Essential loads may include refrigeration, lighting, internet equipment, and a small pump. The U.S. Department of Energy’s Energy Storage Handbook reports typical lithium-ion round-trip efficiency near 85–95%. That loss matters when sizing the array and battery. I also recheck current ratings twice; a neat wiring diagram can still hide a serious mismatch.

Tips: Confirm polarity before energizing the array. Keep battery cables short and properly protected. Check the inverter’s maximum voltage, battery communication requirements, and backup-load capacity. The IEA PVPS Trends in Photovoltaic Applications 2024 report recorded more than 1.6 terawatts of global solar capacity, but larger deployment does not remove local design limits. Follow the applicable electrical code and use a qualified electrician for commissioning. A final inspection is worth the delay.

Testing System Performance and Setting Up Ongoing Maintenance

After connecting solar panels to a home storage system, test each stage before relying on it. A qualified electrician should verify cable polarity, grounding, isolators, and protection devices. Measure the array voltage in sunlight, then compare it with the designed range. Check battery state of charge, charging current, and inverter output under a normal household load. Run a controlled test with lights, refrigeration, and a small heating appliance. The system should remain stable without unusual noise, heat, or warning messages. Record the readings, weather, and load conditions in a service log.

Small details matter. My first inspection overlooked a loose monitoring cable, so the system appeared inactive even while producing energy. That mistake changed my checklist. Inspect connectors, cable insulation, ventilation spaces, and enclosure seals every few months. Remove dust from accessible surfaces, but never spray water near electrical equipment. Review performance data each month and compare daily production with similar weather. A sudden drop can indicate shading, a dirty panel, wiring damage, or battery imbalance. Arrange professional electrical testing at the intervals required by local rules. Have the battery inspected sooner if it smells unusual, swells, leaks, or becomes excessively hot. Keep firmware and protection settings documented, because an unnoticed change can affect charging behavior. Conditions vary. Recheck assumptions after major renovations, new appliances, or extended periods of cloudy weather.

FAQS

How can I check whether solar panels and a home battery are compatible?

Compare panel voltage, current, and maximum power with the inverter’s input limits. Check the battery’s voltage and communication requirements too. Do not guess.

Why does panel configuration matter?

Series connections increase voltage, while parallel connections increase current. Keep both within the inverter’s MPPT limits, even on cold, bright days.

How large should the home battery be?

Measure real household consumption before choosing capacity. Include heating, cooking, refrigeration, pumps, routers, and overnight standby loads. A 10 kWh battery may still feel small.

What safety equipment is needed before making connections?

Use suitable DC disconnects, overcurrent protection, grounding conductors, and surge protection. Wear insulated gloves and eye protection. Keep the battery area dry and ventilated.

What should I inspect before connecting cables?

Check cable insulation, connectors, mounting routes, and entry points. Look for sharp edges and water exposure. Leave service slack, but avoid loose loops.

Why is polarity testing important?

A reversed conductor can damage equipment or create danger. Check polarity before energizing the system. It takes minutes.

How should the completed system be tested?

Verify polarity, grounding, isolators, and protection devices. Measure array voltage in sunlight. Test lights, refrigeration, and a small heating appliance under normal conditions.

What signs suggest the system needs professional attention?

Watch for unusual heat, noise, warning messages, swelling, leaks, or strange odors. Arrange inspection promptly. Do not keep operating a questionable battery.

How can I maintain system performance?

Review production data monthly and inspect connectors, ventilation spaces, seals, and insulation every few months. Remove dust carefully. Never spray water near electrical equipment.

What installation mistake is easy to overlook?

A loose monitoring cable can make an active system appear inactive. My first inspection missed this detail. The checklist needed improvement.

Conclusion

Learning how to connect solar panels to home storage systems begins with checking compatibility among the panels, battery, inverter, charge controller, and home electrical service. Review voltage, current, capacity, grounding requirements, and available space before choosing a wiring layout. A well-planned system should include appropriate disconnects, overcurrent protection, grounding, cable sizing, and clearly identified connection points. Preparing these components in advance helps reduce installation errors and supports safe, efficient operation.

The connection process typically links the solar array to the charge control equipment, battery storage, inverter, and household electrical panel in the correct sequence. After installation, test polarity, voltage, system communication, charging behavior, backup operation, and protective devices under controlled conditions. Ongoing maintenance should include inspecting cables and terminals, checking battery condition, clearing ventilation areas, reviewing system alerts, and confirming that safety equipment remains functional. When considering how to connect solar panels to home storage systems, always follow applicable electrical codes and use a qualified professional for final installation and inspection.

Liam

Liam

Liam is a dedicated marketing professional with a profound expertise in the industry, where he excels at highlighting the unique advantages of our core products. With a keen understanding of market trends and consumer needs, Liam frequently updates our company’s professional blog, providing......